Home
Home
How to Apply for an Outbound Grant?
You can apply for an outbound grant for financial support by following the steps below.
1. Navigate to Exor > Grants.
The Grants dropdown list is displayed.
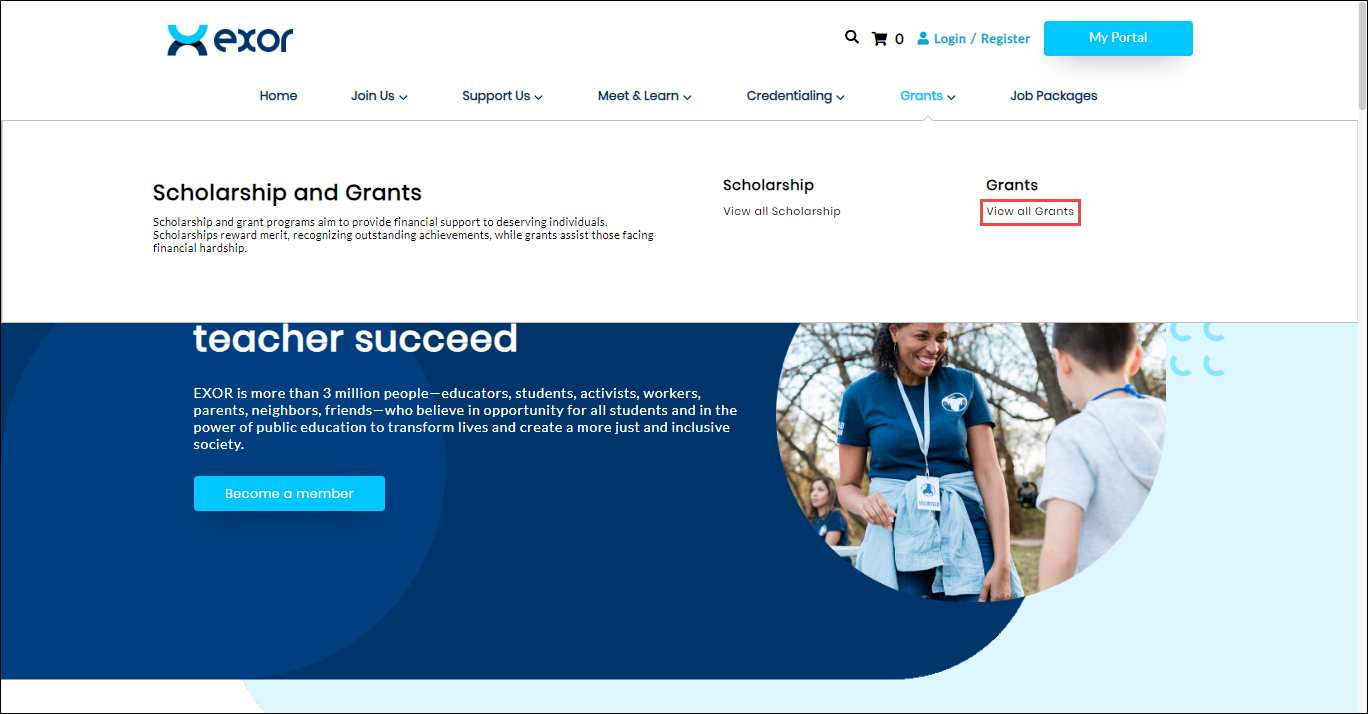
2. Click View all Grants.
The Available Grants page is displayed.
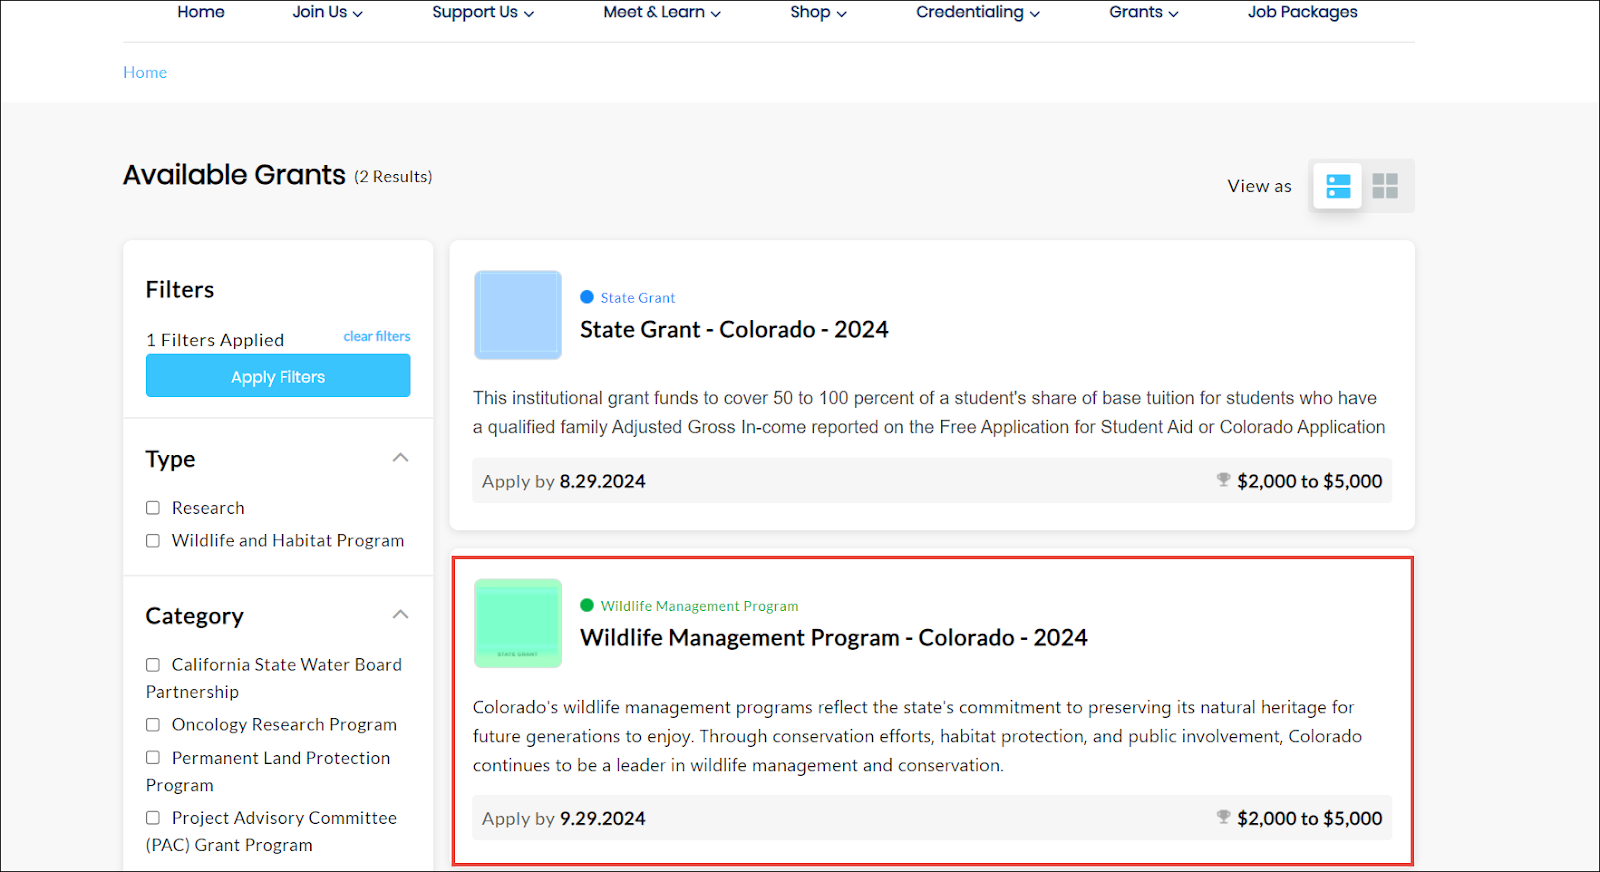
3. Click the grant you wish to apply for.
Note: You can apply the filters (if needed) to narrow down the search grant list.
The selected Grant page is displayed.
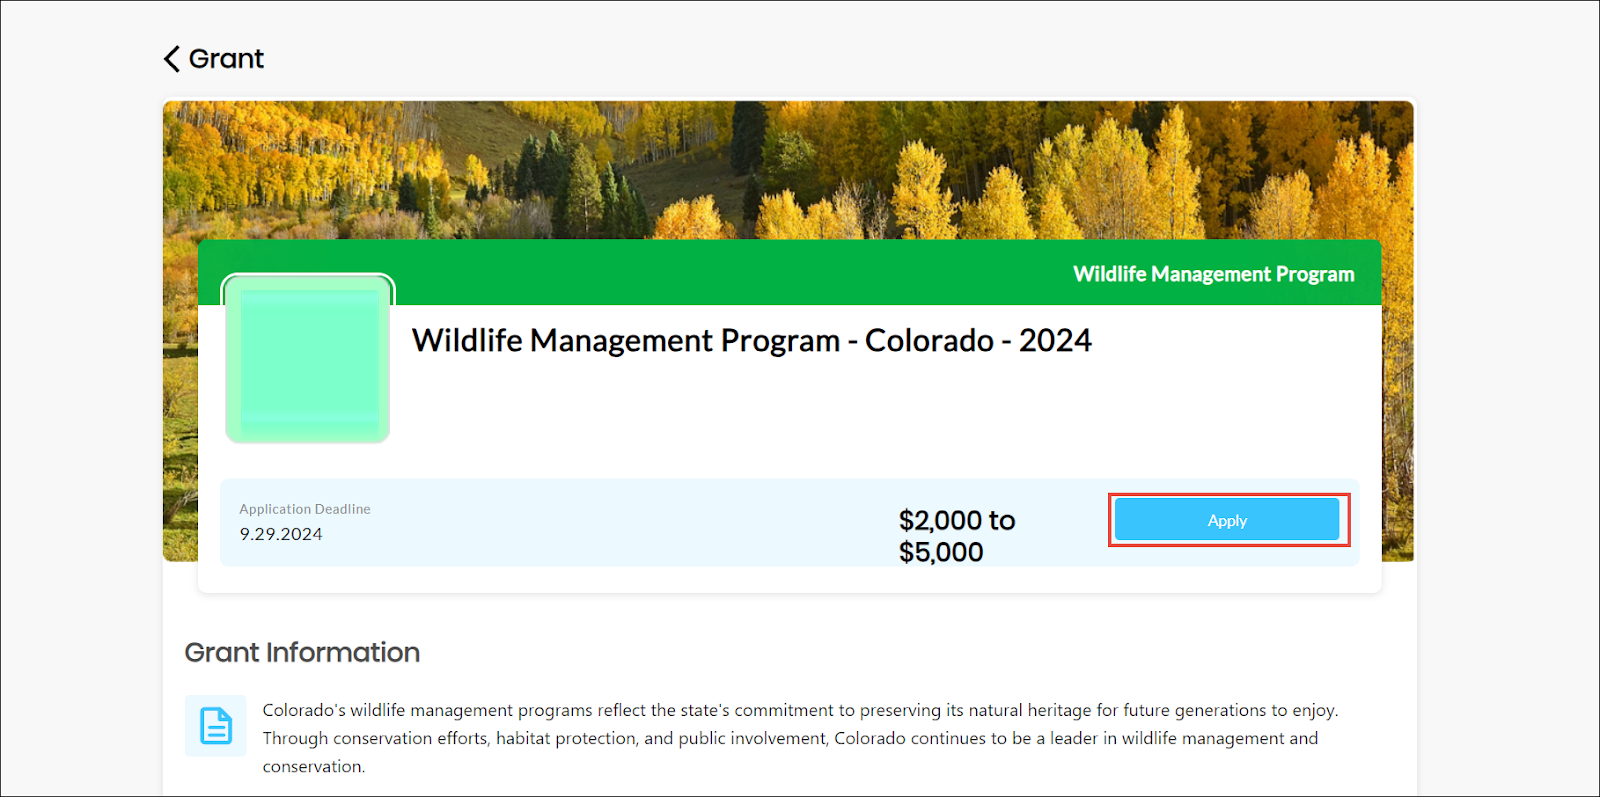
4. Click Apply.
The Checkout page for the grant is displayed if you are logged in to your My Portal account.
Note:
-
You will be redirected to the Sign In page if you are not signed in to My Portal.
-
If you do not have a My Portal account, create a new one. For more information, refer to the My Portal guide.
-
The Checkout page varies depending on whether you are logged in as an individual or an organization.
The following example illustrates the Checkout page for an organization applying for the grant.
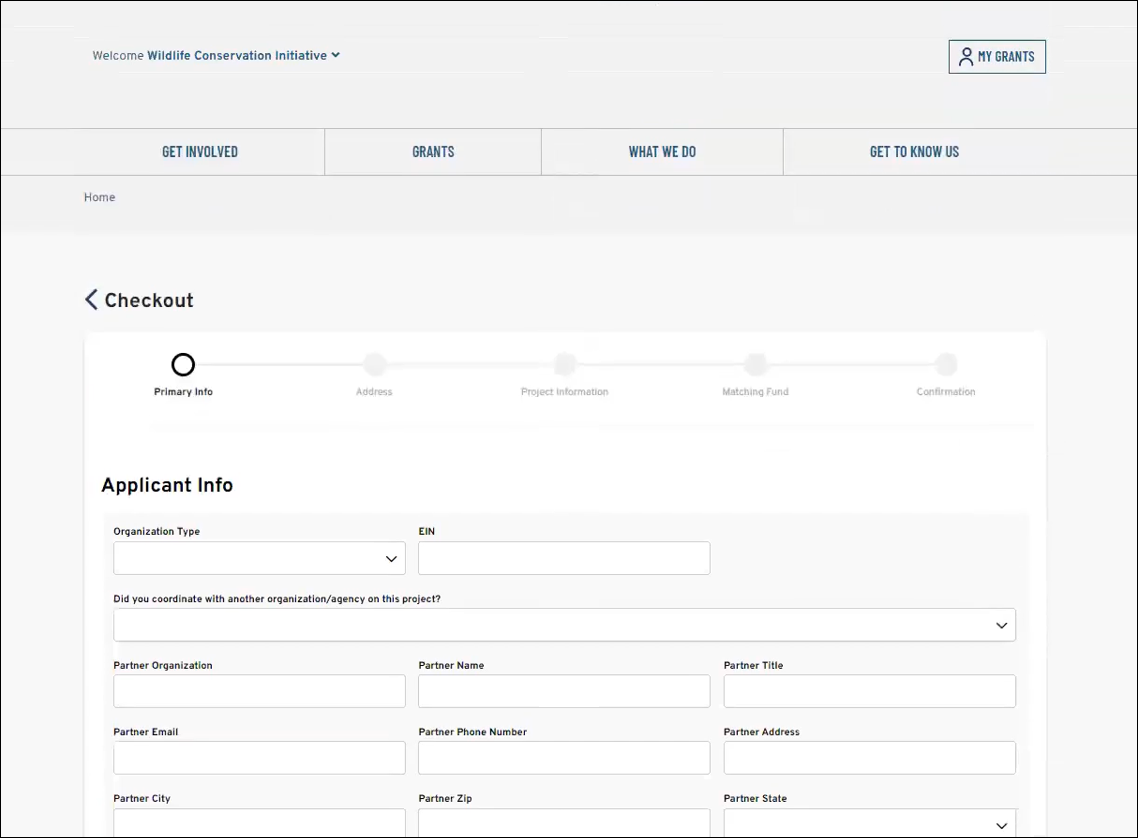
5. Enter or select the required values in the fields within the Checkout wizard’s > Primary Info > Applicant Info section.
Note: The fields in this section may vary based on the client, as they are client-specific webforms, customized for each client.
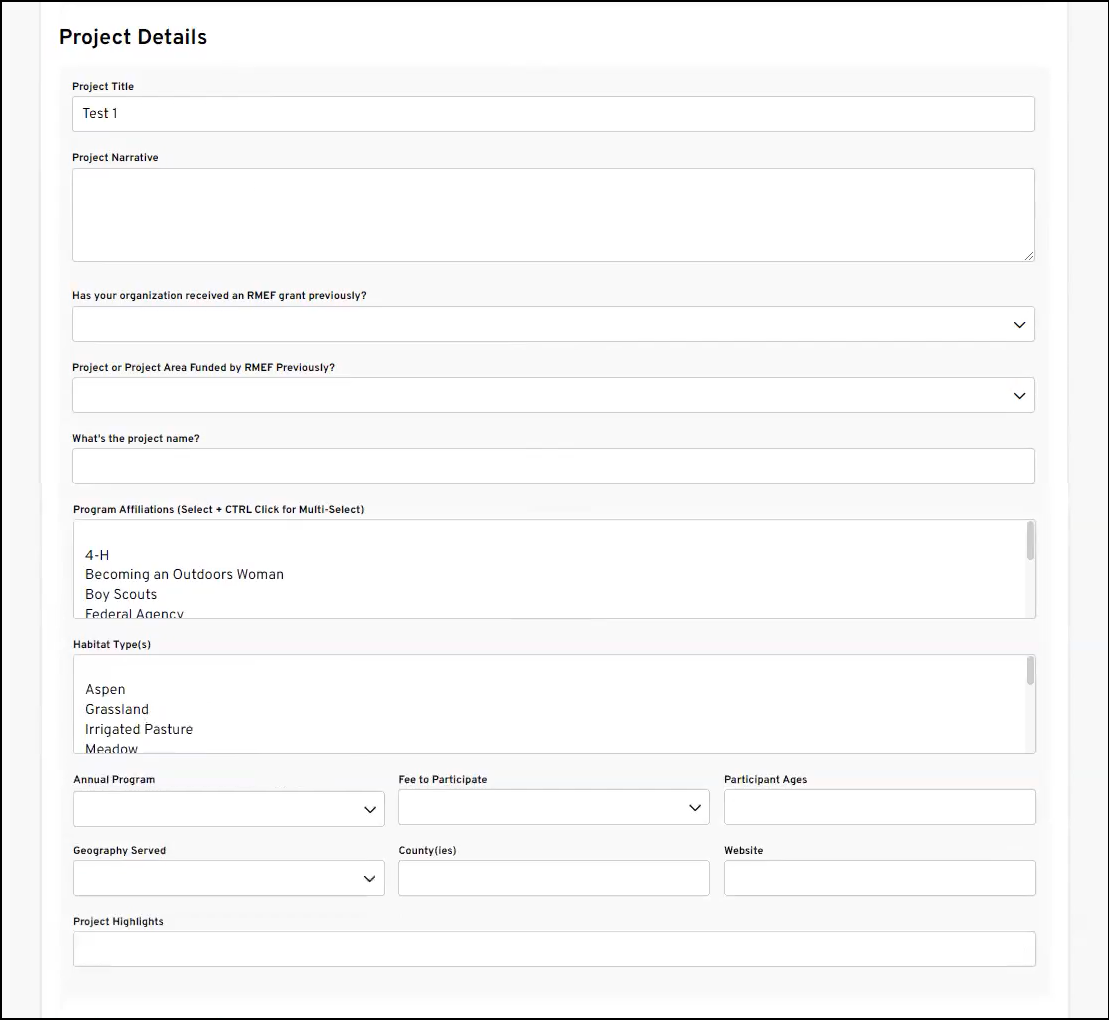
6. Enter or select the required values in the fields under Project Details.
Note: The fields under Project Details may vary based on the associated Outbound Grant.
7. Enter or select the required values under the Project Type Table section.
Note: This is an optional section if required by the client and the fields are customized based on the client.
8. Click Next.
The Checkout wizard’s > Address section related to the applicant’s organization is displayed.
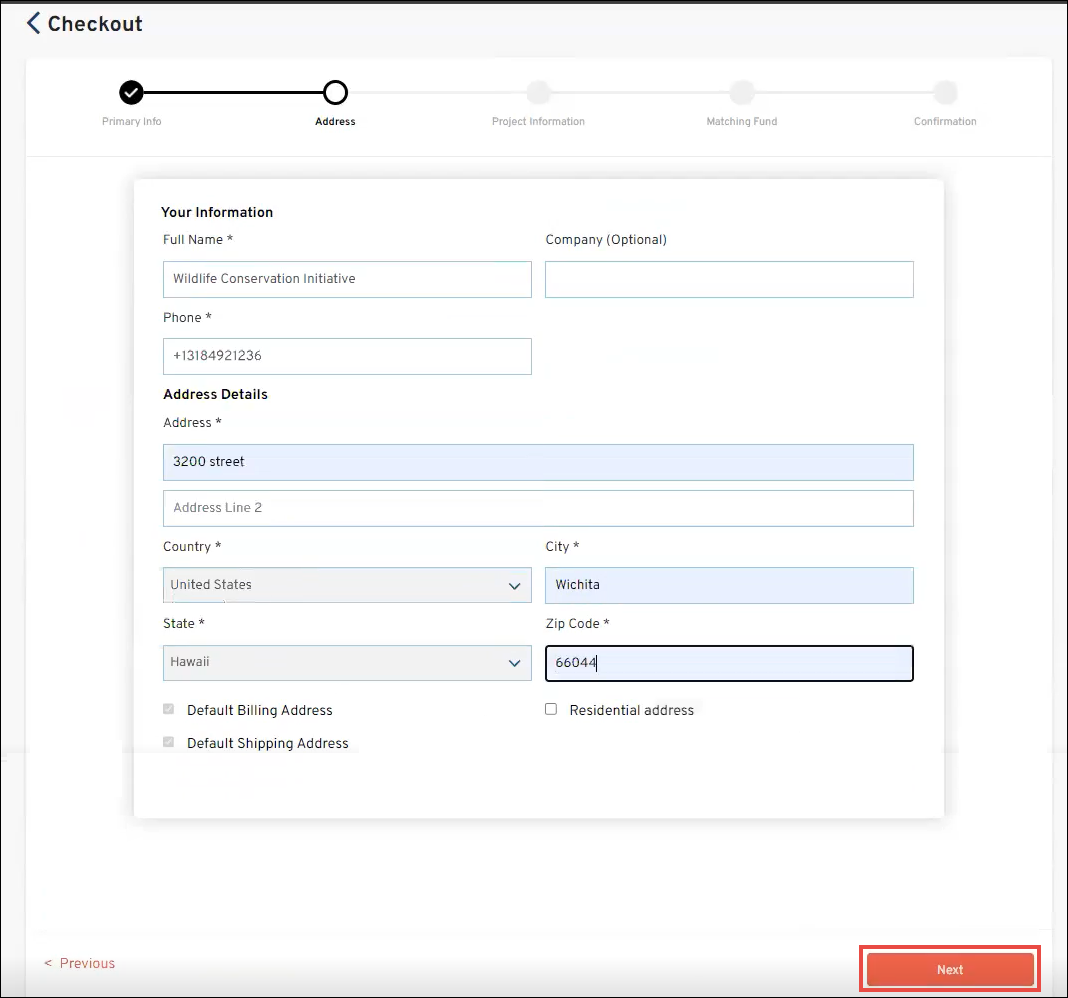
9. Enter or select the required values in the fields.
Note: All fields with an asterisk (*) are mandatory.
Please refer to the following table for field names and their descriptions.
|
Field
|
Description
|
|
Your Information
| |
|
Full Name
|
Applicant’s full name
|
|
Company
|
Company name of the applicant
|
|
Phone
|
Applicant’s phone number
|
|
Address Details
| |
|
Address Line 1
|
Primary address line of the applicant
|
|
Address Line 2
|
Additional address line of the applicant
|
|
Country
|
Applicant’s country
|
|
City
|
Applicant’s phone number
|
|
State
|
Applicant’s State
|
|
Zip Code
|
Applicant’s Zip Code
|
|
Default Billing Address
|
Whether or not this address is the default billing address
|
|
Residential Address
|
Whether or not this address is residential
|
|
Default Shipping Address
|
Whether or not this address is the default shipping address
|
10. Click Next.
The Checkout wizard’s Project Information section is displayed.
Note: This is an optional section if required by the client and the fields are customized based on the client.
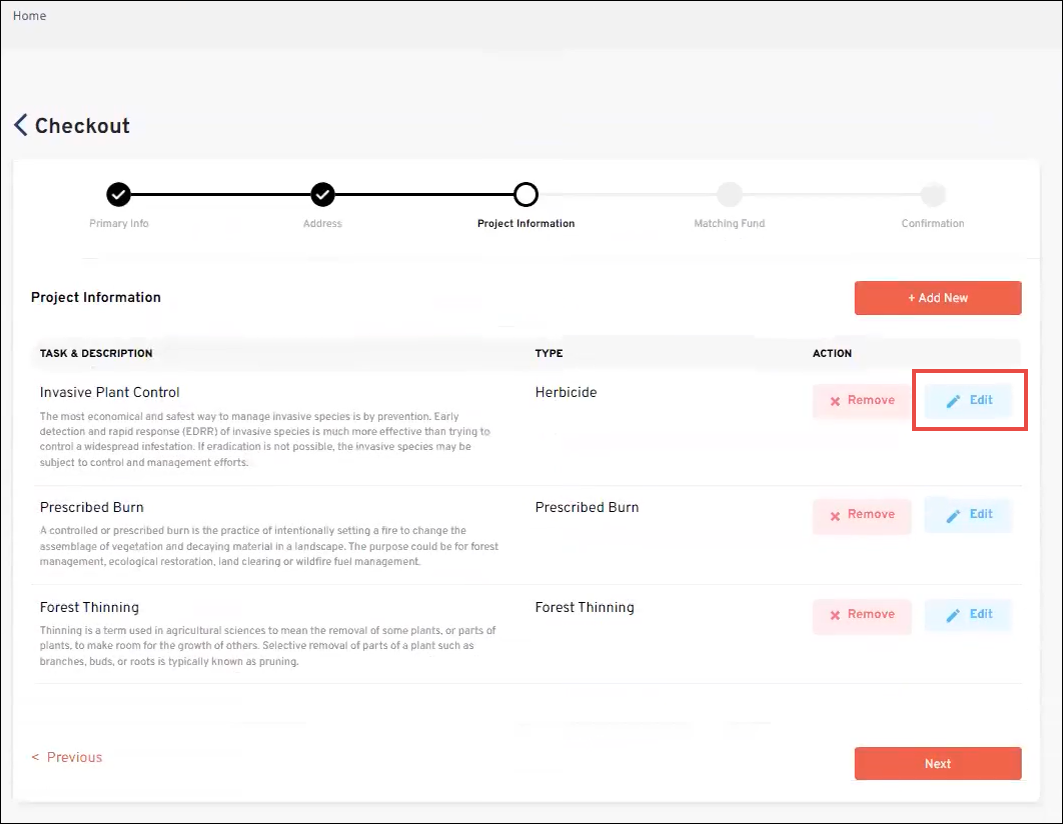
11. Click Add New to add a new task or click Edit in the row of the task you wish to update.
The Add Task or Edit Task dialog is displayed.

12. Enter or select the required values in the fields.
Note: All fields with an asterisk (*) are mandatory.
Please refer to the following table for field names and their descriptions.
|
Field
|
Description
|
|
Task Type
|
Classification to which the task belongs
|
|
Project Task Name
|
Name of the Project the task is associated with
|
|
Description
|
Concise overview of the task
|
|
Additional Information
|
Extra details about the task
|
13. Click Update.
Note: You can delete a task if not needed by clicking Remove in the task row and confirming your action.
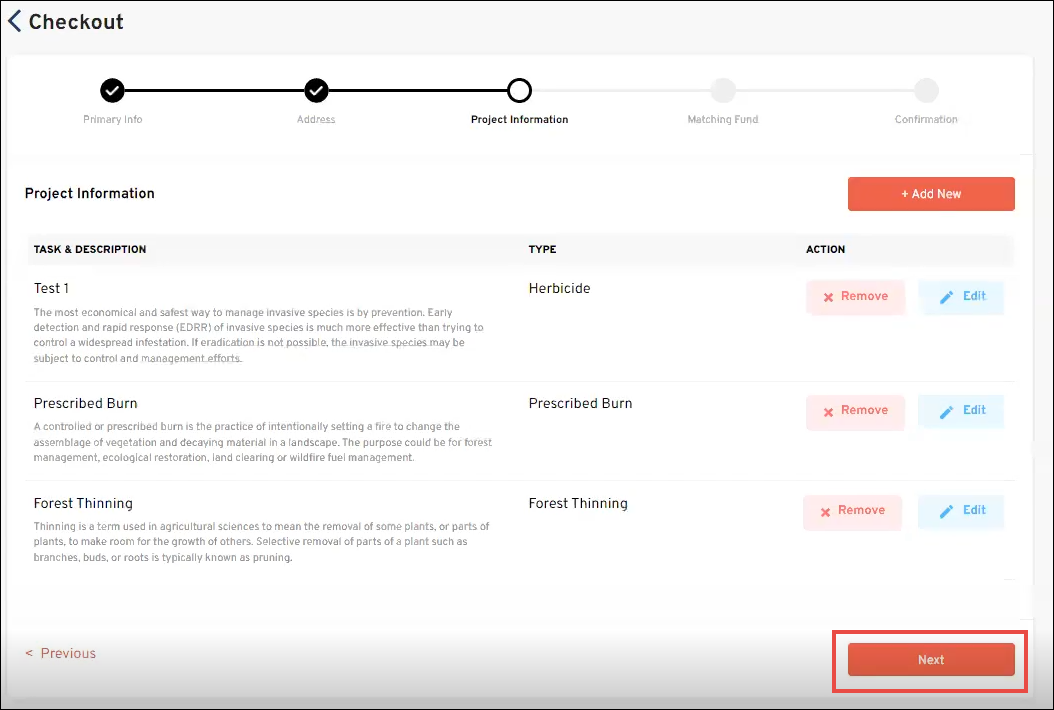
14. Click Next.
The Matching Fund section is displayed.
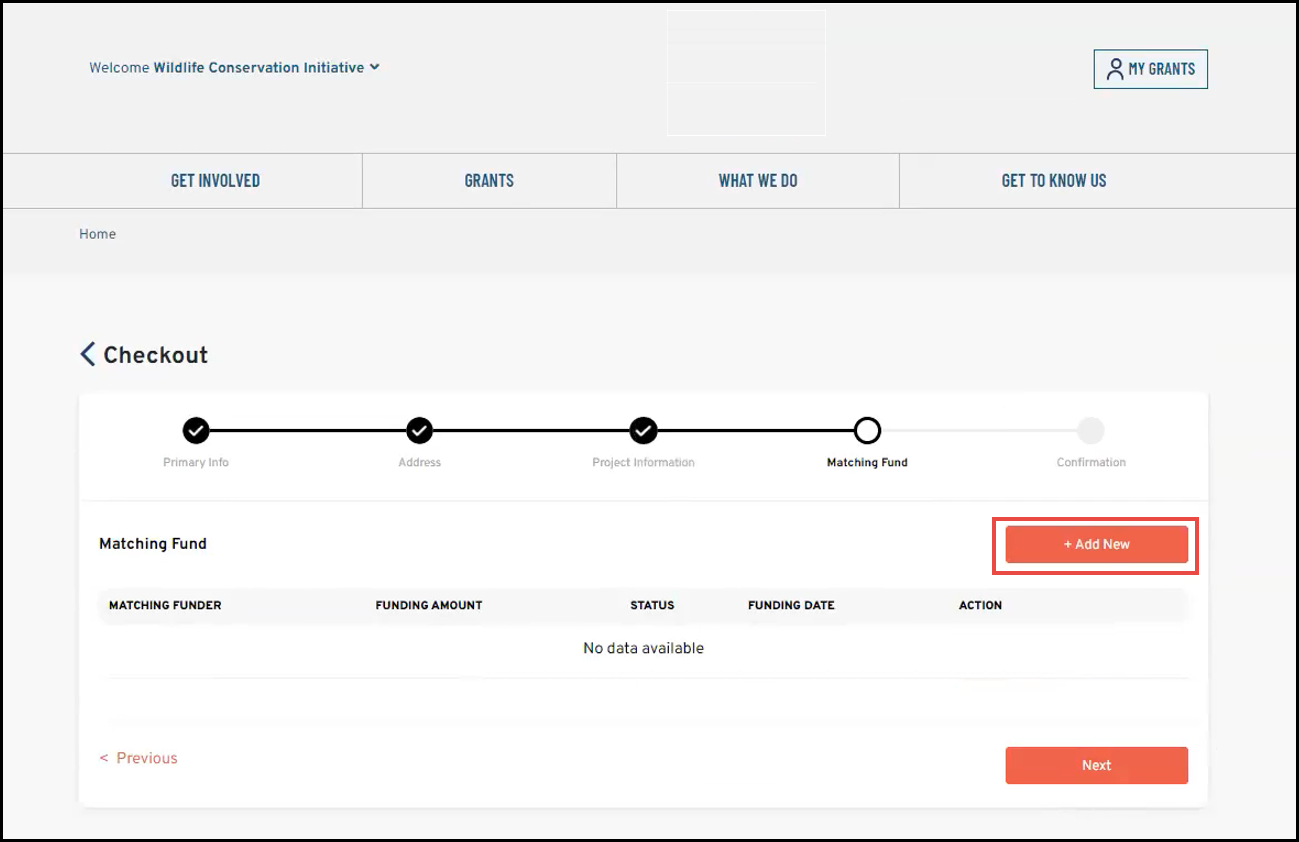
15. Click Add New to add a matching fund for the grant application.
The Add a New Matching Fund dialog is displayed.
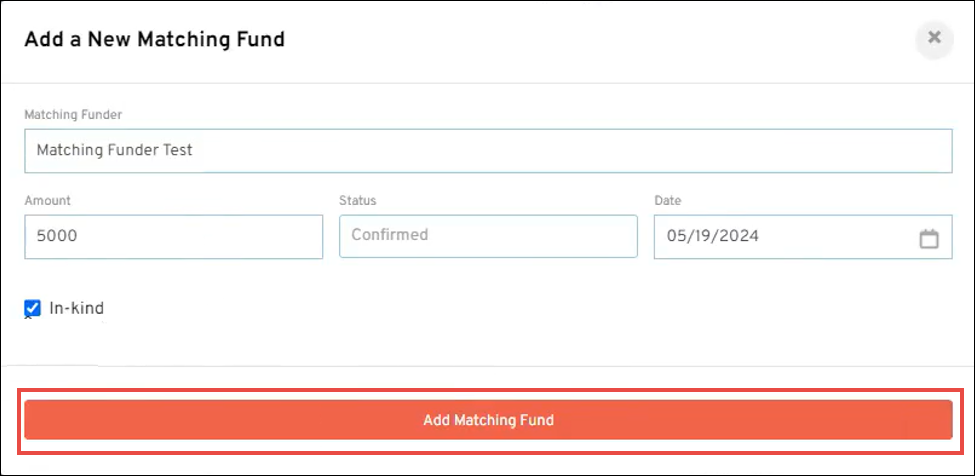
16. Enter or select the required values in the fields.
Note: All fields with an asterisk (*) are mandatory.
Please refer to the following table for field names and their descriptions.
|
Field
|
Description
|
|
Matching Funder
|
Entity or individual who matches the funds provided by the grant to increase the total available funding for the project
|
|
Amount
|
Specific amount for matching the fund
|
|
Status
|
Current status of the matching fund
|
|
Date
|
Specific date related to the grant application
|
|
In-kind
|
Whether or not the matching fund can be in non-monetary contributions
|
17. Click Add Matching Fund.
The matching fund details are added.
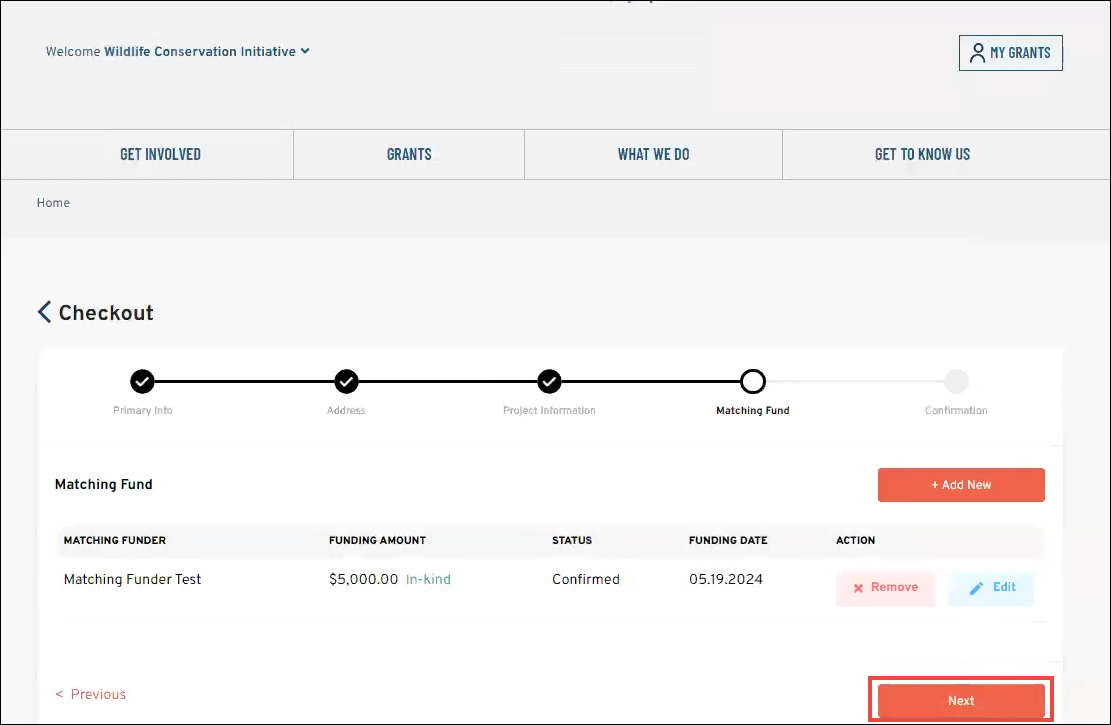
18. Click Next.
The Checkout wizard’s Confirmation section is displayed.
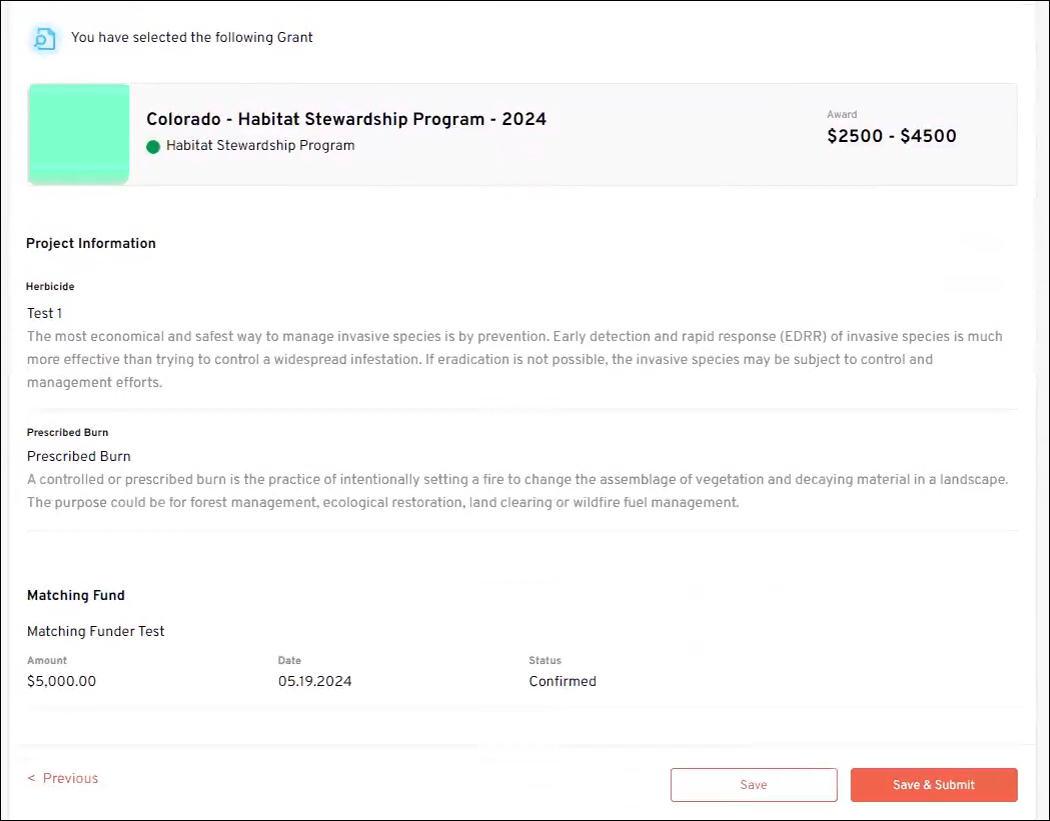
19. Click Save if you wish to update any information later. For more information, please refer to How to Submit Saved Outbound Grant application?
Otherwise, click Save & Submit to save the information and submit the Outbound Grant application.
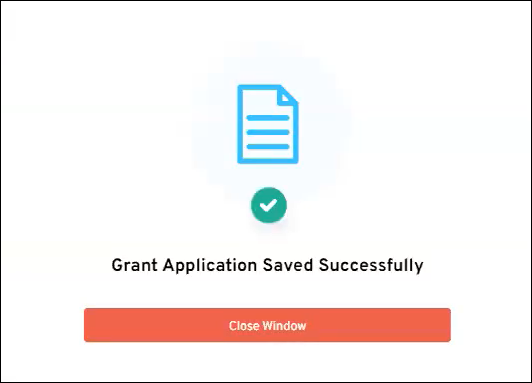
The success notification is displayed.